Ever felt like your cravings control you? We’ve all been there, searching for something in the fridge at night. It’s tough when you try to stay on track but your hunger won’t listen.
- What Is the Pink Gelatin Trick and Why You’ll Love It
- The Secret Behind the Pink Gelatin Trick Recipe
- Gathering Your Ingredients
- Essential Equipment for Your Gelatin Trick
- Preparing Your Kitchen Workspace
- Step 1: Mixing Your Pink Gelatin Base
- Step 2: Creating the First Trick Layer
- Step 3: Executing the Secret Layering Technique
- Step 4: Completing and Setting Your Creation
- Creative Variations and Customization Ideas
- Troubleshooting Your Pink Gelatin Trick Recipe
- Solving Layer Separation Issues
- Fixing Texture and Firmness Problems
- Correcting Color and Clarity Concerns
- Serving, Storage, and Make-Ahead Tips
- Conclusion
- Serving, Storage, and Make-Ahead Tips
- Understanding the Visual Magic
- Perfect Occasions for This Dessert
- How the Layering Technique Creates the Illusion
- The Science of Gelatin Setting
- Gelatin Base Requirements
- Creating the Perfect Pink Hue
- Flavor Enhancers and Mix-Ins
- Mixing and Measuring Tools
- Choosing the Right Mold
- Organization Tips for Smooth Execution
- Temperature Control Essentials
- Blooming the Gelatin Properly
- Dissolving and Combining Ingredients
- Achieving Your Desired Pink Shade
- Pouring the Initial Layer
- Setting Time and Texture Testing
- Preparing for the Next Stage
- The Angle Method for Maximum Effect
- Adding Suspended Elements
- Building Multiple Layers
- Final Layer Application
- Refrigeration Guidelines
- The Unmolding Process
- Color Gradient Techniques
- Flavor Pairing Suggestions
- Adding Edible Decorations
- Solving Layer Separation Issues
- Fixing Texture and Firmness Problems
- Correcting Color and Clarity Concerns
- Presentation Ideas That Wow
- Proper Storage Methods
- Timeline for Advance Preparation
You deserve a way to feel full without constant hunger battles. Many are turning to a simple trick that’s become popular on social media. It’s about using a tool that works with your body, not against it.
Celebrities have used this trick to manage their portions and support their health goals. By making a specific pink dessert before meals, you can feel full and nourished. This habit helps you cut calories without feeling deprived.
This gelatin dessert is a low-calorie snack that fits into a busy life. It uses simple ingredients like hibiscus tea or cranberry juice. Enjoy a sweet treat that supports your weight loss goals.
Key Takeaways
- Learn how to curb your appetite naturally before major meals.
- Discover why this viral trend is a favorite among Hollywood celebrities.
- Understand the role of low-calorie ingredients in supporting weight loss.
- Find out how to prepare this simple snack in just a few minutes.
- Explore the benefits of using natural juices like cranberry and hibiscus.
- Master a habit that helps reduce meal portions without added stress.
What Is the Pink Gelatin Trick and Why You’ll Love It
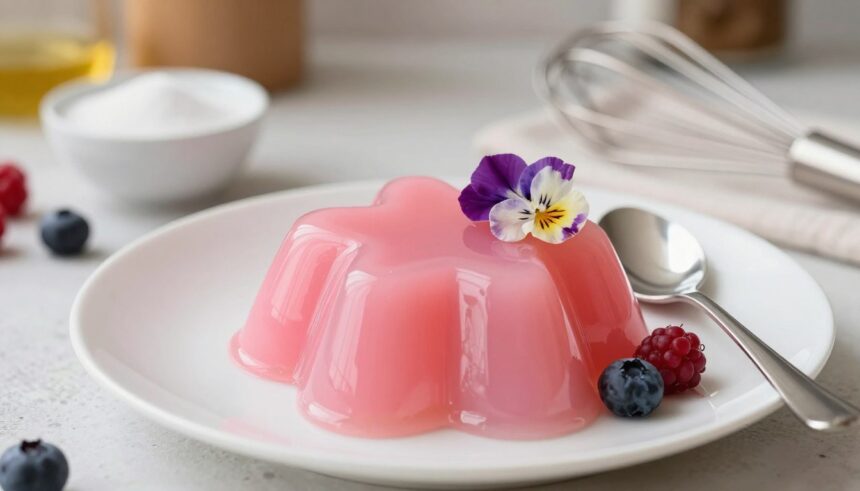
If you’re looking for a fun food trick to impress your friends and family, the pink gelatin trick is perfect. It’s not just tasty but also a visual treat that can make any event special.
This dessert is a layered masterpiece that tricks the eye. It’s a creative dessert that’s both tasty and fun to look at. Its unique look will surely start conversations and make a lasting impression.
Understanding the Visual Magic
The pink gelatin trick’s magic comes from its layered look. This is achieved through a special technique. By pouring and setting each layer carefully, you create a dessert that looks like art.
- The layering technique creates a mesmerizing effect.
- Each layer can be customized with different colors or flavors.
- The final product is a stunning dessert that’s perfect for any occasion.
Perfect Occasions for This Dessert
The pink gelatin trick is great for many events. It’s perfect for birthdays, weddings, or family gatherings. This party food idea is sure to wow everyone.
Some great times to serve the pink gelatin trick include:
- Birthday parties
- Weddings and anniversaries
- Holiday gatherings
Adding the pink gelatin trick to your event will not only give your guests a tasty treat. It will also create a memorable experience for them.
The Secret Behind the Pink Gelatin Trick Recipe
The pink gelatin trick recipe is a mix of art and science. It’s a visual trick that looks amazing. This is thanks to a special layering method and knowing how gelatin works.
Making this colorful jelly is an art. It looks great and is easy to do. By layering carefully, you make a dessert that’s both beautiful and tasty.
How the Layering Technique Creates the Illusion
The layering is key to the pink gelatin trick. Pouring the gelatin at different angles and letting each layer set creates a stunning effect. It takes patience and a steady hand, but it’s worth it.
To get perfect layers, you need to control temperature and timing. Cool the gelatin to the right temperature before pouring. Let each layer set fully before adding the next. This makes sure the layers stay distinct and colorful.
| Layering Technique Tips | Description |
|---|---|
| Temperature Control | Cool the gelatin mixture to the right temperature before pouring. |
| Timing | Allow each layer to set fully before adding the next. |
| Angle of Pouring | Pour the mixture at an angle to create a smooth, even layer. |
The Science of Gelatin Setting
Gelatin setting is a science behind the pink gelatin trick. Gelatin comes from animal bones and connective tissue. When hot water dissolves it, it breaks down into strands. As it cools, these strands form a network, making it firm and jelly-like.
Blooming gelatin is a key step. It means soaking gelatin in cold water before dissolving it in hot water. This ensures it dissolves evenly and sets right, giving a smooth texture.
Knowing how gelatin sets helps fix common problems. By controlling temperature and gelatin to liquid ratio, you can make a dessert that’s both tasty and stunning.
Gathering Your Ingredients
To make your pink gelatin trick, you’ll need a few simple ingredients. These will come together to create a stunning dessert. The quality of your ingredients will affect the final result, so choose the best you can find.
Gelatin Base Requirements
The base of your pink gelatin trick is the gelatin. You’ll need unflavored gelatin for structure without flavor. Hot water is key for dissolving the gelatin. Use about 1 tablespoon of gelatin per cup of hot water.
Creating the Perfect Pink Hue
To get the perfect pink color, use natural pink juice. Cranberry or pink grapefruit juice works well. Adjust the juice amount to get the color you want.
Flavor Enhancers and Mix-Ins
While gelatin and color are key, you can add flavor too. A squeeze of lemon juice or a splash of apple cider vinegar can enhance it. You can also add fruit or nuts for texture and variety.
| Ingredient | Purpose | Example |
|---|---|---|
| Unflavored Gelatin | Provides structure | Knox Unflavored Gelatin |
| Hot Water | Dissolves gelatin | Boiling water |
| Natural Pink Juice | Creates pink color | Cranberry juice |
| Flavor Enhancers | Adds flavor | Lemon juice, apple cider vinegar |
Essential Equipment for Your Gelatin Trick
To make your pink gelatin trick, you’ll need some key tools. The right tools make the process easier and help you get the look you want.
Mixing and Measuring Tools
You’ll start with basic mixing and measuring tools. A mini whisk is key for dissolving gelatin without lumps. You’ll also need measuring cups and spoons to measure ingredients right. A large bowl is needed for mixing the gelatin base. A pouring jug helps move the mixture to your mold.
- Mini whisk
- Measuring cups and spoons
- Large bowl
- Pouring jug
Choosing the Right Mold
The mold you pick is important for your gelatin’s shape and texture. Silicone molds are best because they’re flexible and easy to unmold. You can find silicone molds in many shapes and sizes, letting you be creative with your recipe. Think about the size and shape that will show off your trick best.
Preparing Your Kitchen Workspace
A well-prepared kitchen is key to making a great gelatin dessert. You need to focus on organization and temperature control. This will help you make your colorful jelly recipe smoothly.
Organization Tips for Smooth Execution
To enjoy making your creative dessert, keep everything within reach. Clear your countertops and gather all needed items. This includes gelatin, flavorings, mix-ins, bowls, cups, and molds.
Group your ingredients by type, like dry and wet. This makes following the recipe easier. Also, clean and dry your tools before starting.
Temperature Control Essentials
Temperature is crucial for a gelatin dessert. The ideal setting temperature is 35°F to 40°F (2°C to 4°C). Make sure your fridge is at the right temperature and has enough space for your dessert.
Think about your ingredients’ temperatures too. Bloom your gelatin in cold water, and cool your mixture to room temperature before refrigerating. This helps get the right texture and prevents layer separation.
Step 1: Mixing Your Pink Gelatin Base
Mixing the pink gelatin base is the first step in making this stunning dessert. The quality of your gelatin base is key for the whole pink gelatin trick recipe. You need to focus on a few important things.
The process starts with blooming the gelatin. Blooming means softening gelatin in a liquid before dissolving it. To bloom it right, sprinkle it over cold water and wait a few minutes. This step is vital for even dissolving and avoiding clumps when mixing with hot water.
Blooming the Gelatin Properly
To bloom the gelatin, measure the right amount for your gelatin recipe. Sprinkle it over cold water in a bowl. Let it sit for about 5 minutes until it’s soft and spongy. This step is key for a smooth gelatin texture.
Dissolving and Combining Ingredients
After blooming, dissolve the gelatin in hot water. Heat the water gently, not boiling, and pour it over the gelatin. Stir until it’s fully dissolved. Then, mix this with sugar, flavorings, and pink juice for your jello recipe. Make sure all ingredients are well mixed to avoid lumps or uneven color.
Achieving Your Desired Pink Shade
The last step is getting the right pink shade. Adjust the color by adding more or less pink juice. Add coloring slowly, stirring well each time, until you get the color you want. Remember, the color will lighten as it sets, so aim for a deeper color.

By following these steps, you’ll have a ready pink gelatin base for your pink gelatin trick recipe. This base is essential for the visual magic in the next layers.
Step 2: Creating the First Trick Layer
Making the first layer of your gelatin trick is key. It lays the groundwork for the rest of your creative dessert. This layer is crucial for the look of your dessert.
Pouring the Initial Layer
Start by pouring the pink gelatin mixture into your mold. Make sure the mold is clean and dry. This prevents any unwanted texture or sticking.
Pour the layer carefully to avoid air bubbles. Air bubbles can ruin the look of your dessert.
Setting Time and Texture Testing
Let the first layer set after pouring. The time it takes depends on the layer’s thickness and your fridge’s temperature. A 1/4 inch thick layer usually sets in 30 minutes to an hour.
| Layer Thickness | Setting Time | Texture |
|---|---|---|
| 1/4 inch | 30-60 minutes | Firm but slightly jiggly |
| 1/2 inch | 1-2 hours | Firm and springy |
| 3/4 inch | 2-3 hours | Very firm |
Preparing for the Next Stage
Check the texture of the first layer once it’s set. It should be firm but still slightly jiggly. If it’s too runny, it won’t hold the next layer well. If it’s too firm, it won’t stick to the next layer.
Adjust the setting time based on your texture test. With the first layer set, you’re ready for the next step. The layering process is where the magic happens. With patience and practice, you’ll create a stunning gelatin dessert that will wow everyone.
Step 3: Executing the Secret Layering Technique
Now that you’ve made your pink gelatin base, it’s time to learn the secret layering technique. This step turns a simple dessert into a stunning masterpiece. With this technique, you’ll create a colorful jelly recipe that will wow everyone.
To get the right look, pour the layers at an angle. This method makes your dessert look amazing and creates a multi-colored effect. It’s what makes the jello recipe so special.
The Angle Method for Maximum Effect
The angle method means pouring gelatin into the mold at a certain angle. Tilt your mold and pour the mixture down one side. This way, the layers set clearly, making your dessert look beautiful and colorful.
Adding Suspended Elements
To make your colorful jelly recipe even more stunning, add fruit or edible flowers between the layers. They add color and texture, making your dessert even more attractive.
Building Multiple Layers
Creating multiple layers is essential for the pink gelatin trick recipe‘s signature look. Let each layer set before adding the next. This patience will be worth it when you unmold your dessert and see the beautiful layers.
By following these steps and tips, you’ll make a stunning jello recipe that will impress everyone. Remember, the secret to success is in the layering technique and being patient with each layer.
Step 4: Completing and Setting Your Creation
The final steps to make your pink gelatin trick are key. They make sure your dessert looks great and tastes amazing. You’ve made the layers and are ready to finish your gelatin dessert.
Final Layer Application
When adding the final layer, make sure the previous one is set but still soft. This helps the layers stick together well. Pour the final layer slowly and evenly to avoid mixing the layers.
Refrigeration Guidelines
Refrigeration is crucial for setting your gelatin dessert. Put your mold in the fridge for 3-4 hours or overnight. Keep the fridge at a steady temperature and away from strong smells, as gelatin can pick up odors.
The Unmolding Process
To unmold your gelatin dessert, dip the mold in warm water for a few seconds. This loosens the gelatin from the mold. Then, flip the mold onto a serving plate and lift it off gently. If it doesn’t come out, you can try again or use a knife to help.
| Step | Description |
|---|---|
| 1 | Dip the mold into warm water for a few seconds. |
| 2 | Invert the mold onto a serving plate. |
| 3 | Gently lift off the mold. |

By following these steps, you’ll make a stunning and tasty gelatin dessert. Your sweet treat is now ready to be enjoyed by everyone.
Creative Variations and Customization Ideas
Make your pink gelatin dessert even more fun by trying out new color gradients and flavors. This recipe is perfect for any party or special event. You can make it your own.
This dessert is all about being creative. You can add your own twist to make it stand out. Here are some ideas to get you started:
Color Gradient Techniques
Adding a color gradient can make your dessert look amazing. You can layer different gelatin colors to create a beautiful effect. Start with a light pink at the bottom and go darker towards the top.
- Try different colors to match your party theme.
- Use a dropper for small amounts of food coloring.
- Try glow-in-the-dark coloring for something unique.
Flavor Pairing Suggestions
While the classic pink gelatin is tasty, you can make it even better. Try pairing it with flavors like:
- Fruit flavors like strawberry or raspberry for a fruity taste.
- Citrus flavors like lemon or orange for a tangy twist.
- Vanilla or almond extract for a creamy element.
Adding Edible Decorations
Edible decorations can make your dessert even more special. Consider adding:
- Sprinkles or nonpareils for a festive look.
- Fresh fruits or fruit slices for natural sweetness and texture.
- Chocolate shavings or edible glitter for a luxurious finish.
With these creative ideas, you can make your pink gelatin dessert a hit at any party. It will impress your guests and leave a lasting memory.
Troubleshooting Your Pink Gelatin Trick Recipe
Having trouble with your pink gelatin trick recipe? Don’t worry, we’ve got you covered. This dessert is sure to wow, but it can be a bit tricky to make. We’ll help you solve common problems and make sure your dessert turns out great.
Solving Layer Separation Issues
Layer separation is a common problem with this recipe. It happens when you don’t layer right or if the temperature changes. To avoid this, pour each layer carefully and let it set before adding the next. If separation starts, try adjusting the temperature or gently mixing the layers.
Tips to prevent layer separation:
- Ensure each layer is set before adding the next.
- Maintain a consistent refrigerator temperature.
- Avoid over-mixing or stirring the gelatin mixture too vigorously.
Fixing Texture and Firmness Problems
The texture and firmness of your pink gelatin trick are key. If it’s too soft or too firm, it can ruin the dessert. Use the right amount of gelatin and make sure it’s fully dissolved. If it’s too soft, chill it longer. If it’s too firm, adjust the gelatin amount.
Common causes of texture issues:
- Insufficient gelatin or improper dissolution.
- Incorrect refrigerator temperature.
- Over- or under-setting time.
Correcting Color and Clarity Concerns
The color and clarity of your pink gelatin trick are important. If it’s not colorful enough or cloudy, there are fixes. Use good food coloring and avoid mixing too much to prevent bubbles.
Tips for achieving the perfect color and clarity:
- Use high-quality food coloring.
- Avoid over-mixing the gelatin mixture.
- Ensure the gelatin is fully dissolved before pouring it into the mold.
By following these tips, you should be able to fix common problems with your pink gelatin trick recipe. You’ll get a beautiful, delicious dessert that will impress your guests.
Serving, Storage, and Make-Ahead Tips
Now that you’ve learned the pink gelatin trick recipe, it’s time to think about serving it. The presentation can make it a memorable party food idea. It’s a creative dessert that will impress your guests.
To make your gelatin dessert stand out, consider these presentation ideas:
Presentation Ideas That Wow
- Use a decorative mold to unmold your gelatin dessert onto a serving plate or platter.
- Garnish with fresh fruits or edible flowers to add a pop of color and freshness.
- Create a themed presentation by surrounding the dessert with elements that match your party theme.
Proper storage is key to keeping your gelatin dessert fresh. Here are some tips:
Proper Storage Methods
To keep your gelatin dessert fresh, store it in the refrigerator at a consistent temperature below 40°F (4°C). If you need to store it for an extended period, consider covering it with plastic wrap or aluminum foil to prevent drying out.
For longer storage, you can also freeze the dessert. However, be sure to thaw it properly in the refrigerator before serving to maintain its texture.
Timeline for Advance Preparation
The pink gelatin trick recipe can be prepared ahead of time. Here’s a general timeline to help you plan:
- Up to 3 days in advance: Prepare the gelatin dessert and store it in the refrigerator.
- 1 day in advance: Finalize the presentation and make any necessary adjustments.
- On the day of serving: Unmold the dessert and garnish as desired.
By following these tips, your gelatin dessert will be a hit at your next party or gathering.
Conclusion
You’ve discovered how to make a stunning pink gelatin trick recipe. It’s perfect for impressing your loved ones. Just follow the steps in this article to create a beautiful gelatin dessert.
The secret to this dessert is in its layering and the science of gelatin. With practice, you can try different flavors and colors. This way, each pink gelatin trick recipe will be special and yours alone.
Feel free to be creative and try new things. This dessert is great for any occasion or just a sweet treat. Its mesmerizing layers and tasty flavor will surely impress everyone.
Serving, Storage, and Make-Ahead Tips
Understanding the Visual Magic
The magic of this dessert is its clear look and how it catches the light. It’s all about clever layering and angles, making it look like art. Plus, the natural colors stay bright and inviting, without artificial dyes.
Perfect Occasions for This Dessert
This recipe is perfect for any event, from baby showers to summer brunches. Its light texture makes it great as a snack or dessert, without sacrificing taste.
How the Layering Technique Creates the Illusion
The trick is in the timing and angle. By setting the dessert at an angle, you can pour a contrasting layer on top. This creates a colorful, layered effect that wows everyone.
The Science of Gelatin Setting
Success comes from the science of collagen. Blooming the gelatin ensures it sets right, without lumps. This gives you a clear finish that shines.
Gelatin Base Requirements
For the best results, use high-quality Knox Unflavored Gelatin. It provides structure without adding flavor, letting your juice shine.
Creating the Perfect Pink Hue
To get that perfect pink, use natural ingredients. Mix Pom Wonderful juice with water or steep hibiscus tea for a deep magenta. Add coconut milk for a creamy pastel pink.
Flavor Enhancers and Mix-Ins
Enhance your dessert with honey, monk fruit sweetener, or fresh lime juice. These add a touch of sweetness and balance.
Mixing and Measuring Tools
You’ll need a Pyrex measuring cup and a mini whisk for mixing. A small saucepan is also key for heating your juice.
Choosing the Right Mold
The shape of your dessert depends on your mold. Clear glass ramekins or wine glasses show off the layers. A silicone Bundt mold makes a stunning centerpiece.
Organization Tips for Smooth Execution
Clear a flat space in your fridge before starting. This ensures your glasses stay stable during chilling.
Temperature Control Essentials
Gelatin is sensitive to heat. Never boil your mixture. Aim for “steaming hot” to preserve the gelatin’s setting power.
Blooming the Gelatin Properly
Start by sprinkling gelatin over cold water or juice. Let it sit for 5 minutes until it’s like a sponge. This is crucial for a smooth dessert.
Dissolving and Combining Ingredients
Slowly add hot juice to the bloomed gelatin, whisking constantly. Make sure all crystals dissolve for a smooth texture.
Achieving Your Desired Pink Shade
Adjust the color by adding more or less juice. For a gradient, use different amounts of water or cream in each layer.
Pouring the Initial Layer
Pour the first layer into your glasses, filling them halfway for the classic trick.
Setting Time and Texture Testing
Chill the glasses in the fridge. Use an egg carton or bowl of rice to hold them at a 45-degree angle. Let it set for 2 hours.
Preparing for the Next Stage
The surface should be firm but slightly tacky. This ensures the next layer sticks well.
The Angle Method for Maximum Effect
Once set, set the glass upright. Pour the next layer to create a sharp diagonal line, enhancing the dessert’s appeal.
Adding Suspended Elements
Add fresh berries or edible gold flakes before the second layer sets. This makes them appear to float.
Building Multiple Layers
Repeat the process with different colors or a white coconut layer. This builds a complex, colorful dessert.
Final Layer Application
Pour the final layer gently over a spoon to avoid breaking the layers beneath.
Refrigeration Guidelines
Chill the dessert overnight for the best results. This ensures it’s perfectly set and stable.
The Unmolding Process
To unmold, dip the mold in warm water for 5–10 seconds. Then, gently pull it away and flip onto a plate.
Color Gradient Techniques
Try an “Ombré” effect by layering different shades of pink. Start with deep magenta and end with pale blush.
Flavor Pairing Suggestions
Pair your dessert with Cool Whip or fresh mint. Cranberry juice and vanilla cream make a great combination.
Adding Edible Decorations
Top with fresh raspberries or sparkling sugar before serving. This adds a touch of elegance.
Solving Layer Separation Issues
If layers separate, it’s because the first layer was too cold. Next time, pour the second layer when it’s just set, or lightly score the surface.
Fixing Texture and Firmness Problems
If it’s too soft, you used too much liquid. If too rubbery, too much gelatin. Use a 1:2 ratio of gelatin to liquid for the right texture.
Correcting Color and Clarity Concerns
Cloudiness comes from whisking too hard or using unfiltered juice. Skim off any foam before setting.
Presentation Ideas That Wow
Serve in champagne flutes for an elegant touch. The height highlights the layers beautifully.
Proper Storage Methods
Keep covered with plastic wrap to prevent odors and a “skin.” It stays fresh for up to 5 days.
Timeline for Advance Preparation
This dessert is perfect for making ahead. Start the first layer a day before to ensure perfect setting.